

How To Apply Makeup For Day Of The Dead
The Twenty-four hour period of the Expressionless is fast approaching!
What is it?
Information technology's not just an underrated George Romero film: in fact, information technology's one of the world'due south about popular holidays. Throughout United mexican states, Central America, and parts of the Us.
When is it?
People observe the Twenty-four hours of the Dead on November 1 and 2 as a way of honoring their ancestors, embracing the bike of life, and having awesome graveyard picnic parties.
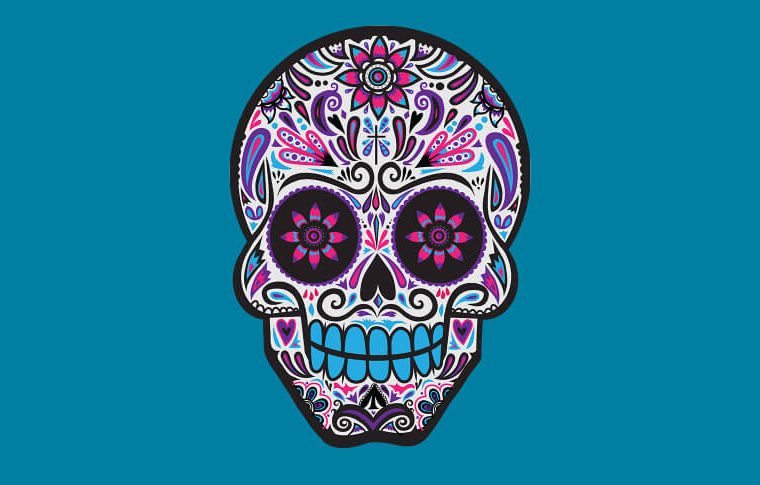
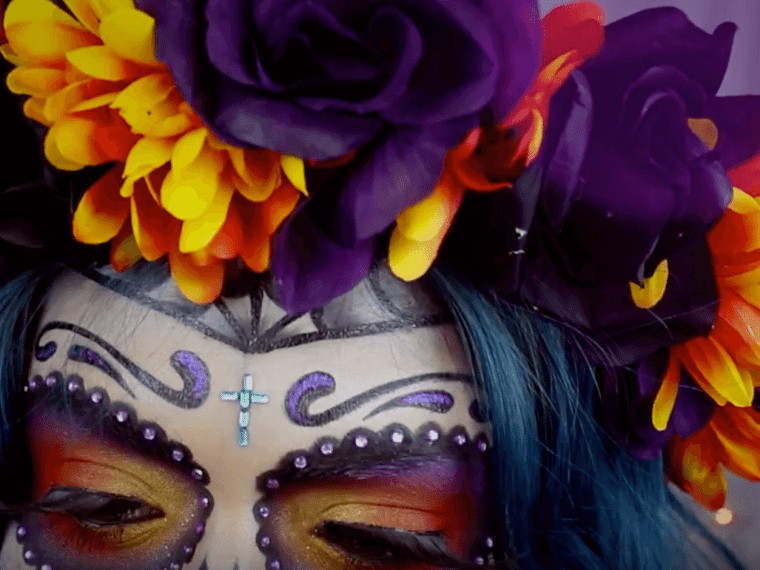
Among the most beautiful and recognizable Day of the Dead symbols is the Calavera, or decorative skull.
If y'all happen to be in Playa del Carmen around the end of October early November then why not celebrate with us!
Heck, fifty-fifty if y'all're not here this makeup tutorial is the perfect Halloween costume. Yous don't accept to purchase anything new, and all-time of all it looks just stunning.
And then, this 24-hour interval of the Dead orDia de los Muertos, as we call it en la neighborhood plough yourself into a skeletal masterpiece.
Nosotros can show yous how in this super easy and fun makeup tutorial.
Don't forget to share your own recreations with usa in the comments section, we would dear to see them!
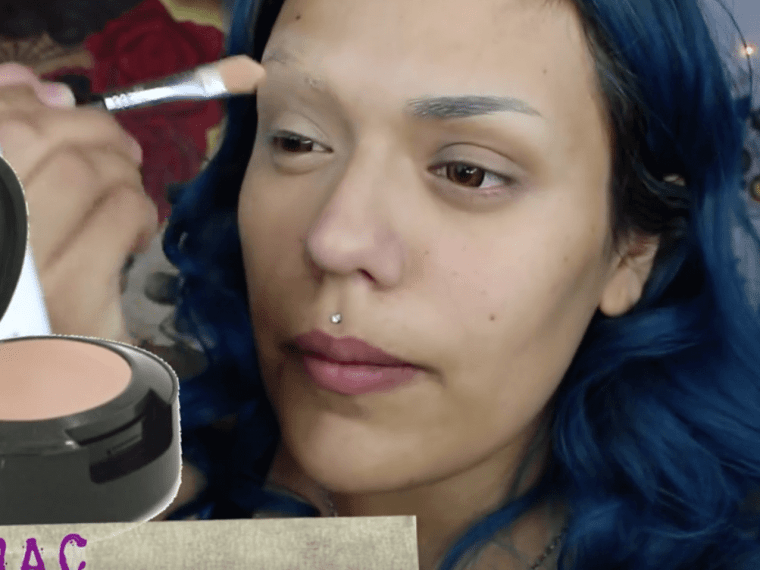
Step ane: Primer
Time to prime your face! You can't paint a masterpiece without a perfect base.
Massage an even amount of primer all over your confront in round motions.
Pace 2: Muffle Your Brows
If you want this look to be flawless then you need to conceal your brows before you lot go started with the details.
Using a spoolie brush and some eyebrow gel flatten downwards your eyebrow hair equally best you tin can. Then go in with a pigmented concealer and pack on the product till you can no longer run into your brows.
Ta-dah! Now you accept the perfect canvas to get started.
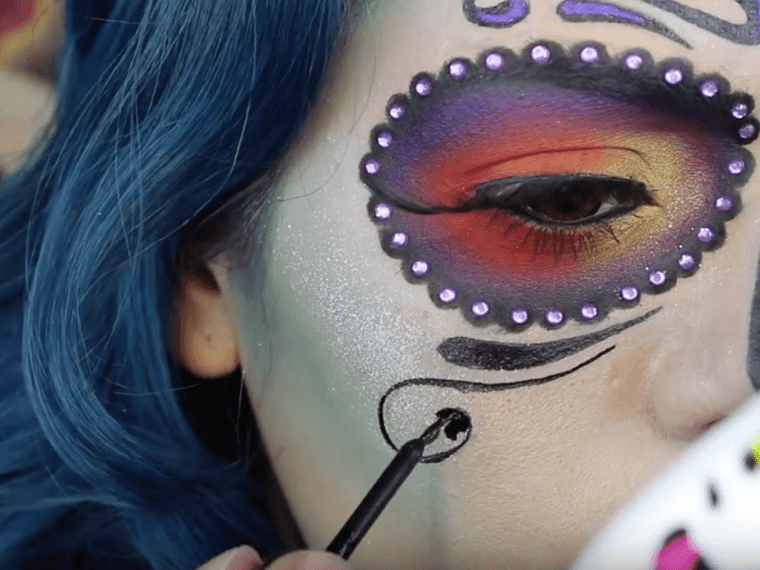
Stride three: Outline Your Centre Socket
Using a pencil eyeliner, lightly outline a round shape like this effectually the exterior of your eye.
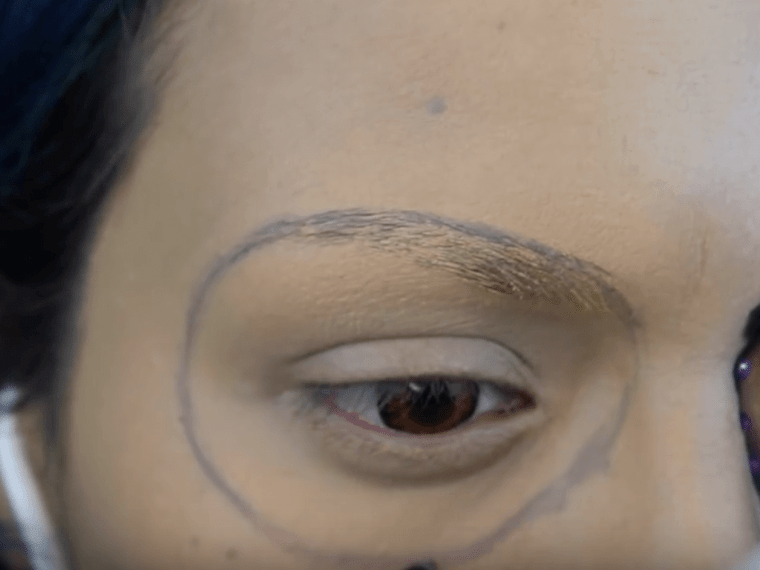
Don't worry if you mess information technology upwardly the commencement time, merely take your time, and don't draw the line on besides heavy.
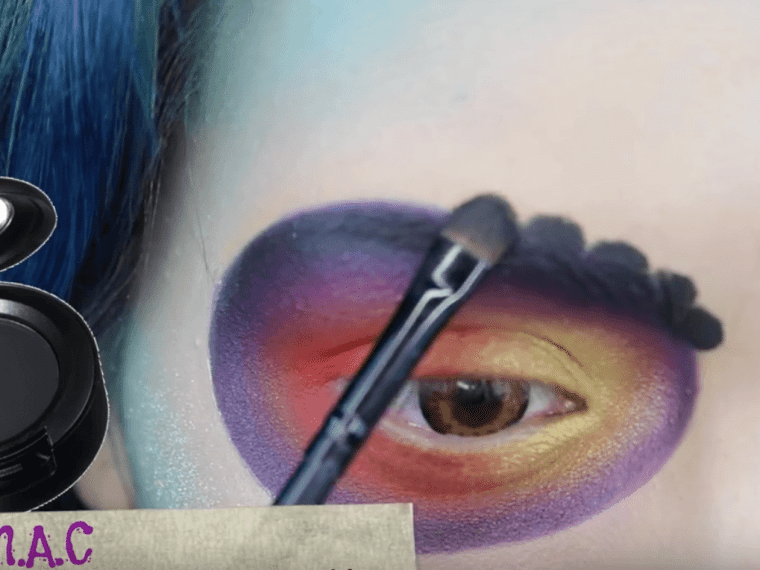
Step 4: Add Some Color
Time to add some color to really brand your eyes Pop!
I'd suggest using contrasting colors. Hither Lola Love beauty has used a shimmery golden color, paired with a bright ruddy/orangish, and purple.
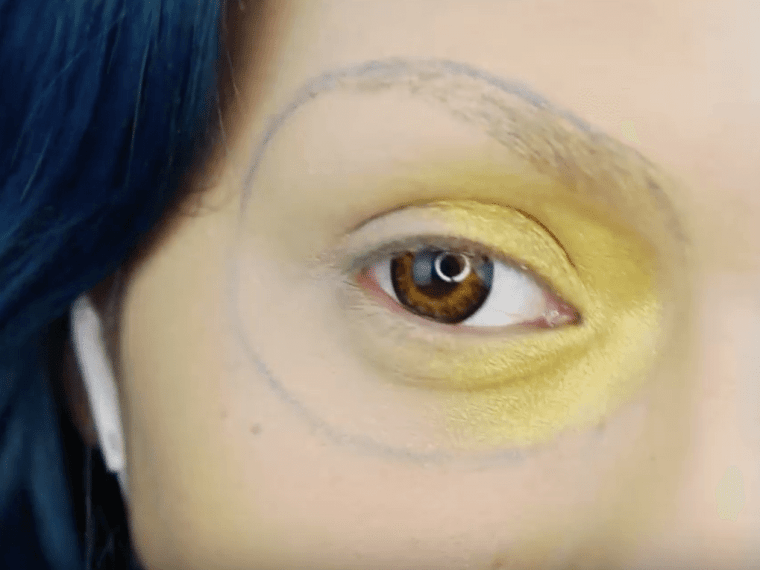
First, blend your the lightest color into the inner corner of your eye.
Stride v: Add Your Second Color
2d, add a contrasting color to the eye of your lid so it looks something a little similar this.
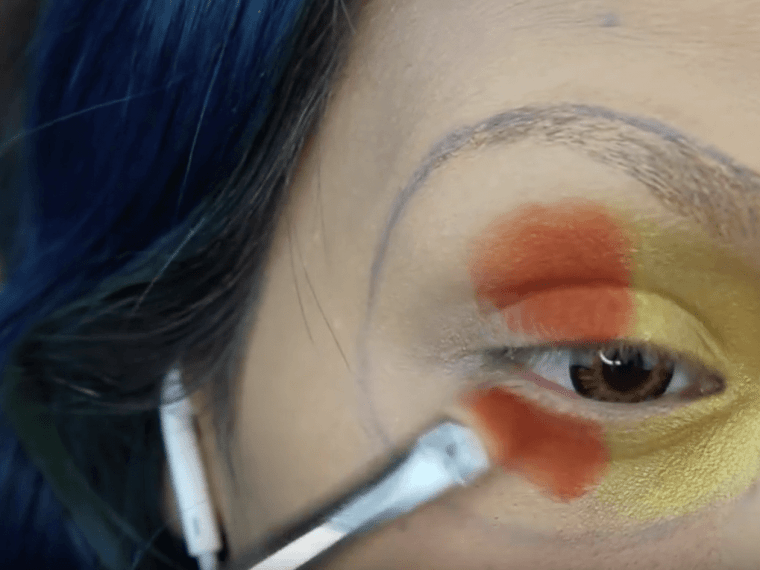
Pack the product on with a dumbo makeup brush and be sure to spread information technology underneath your lower lash line.
Pace vi: Blend And Outline
Third, pack your concluding color onto the line you drew around your eye. In one case you're happy with information technology, apply a fluffy eyebrow brush and blend, blend, blend.

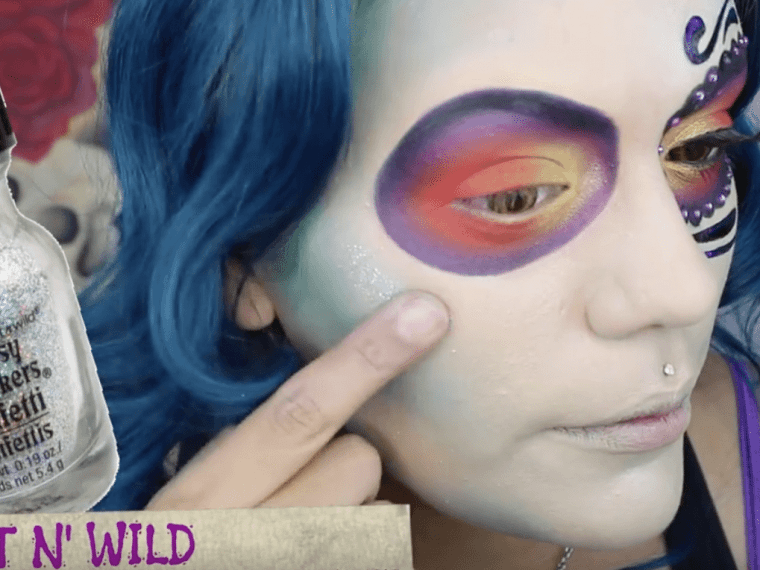
Step 7: Use Concealer To Neaten Upward The Edges
Wow! At present it's actually starting to take shape. Don't worry if information technology looks a little messy, using your concealer and an angled makeup castor, tidy up the edges until it looks smashing.
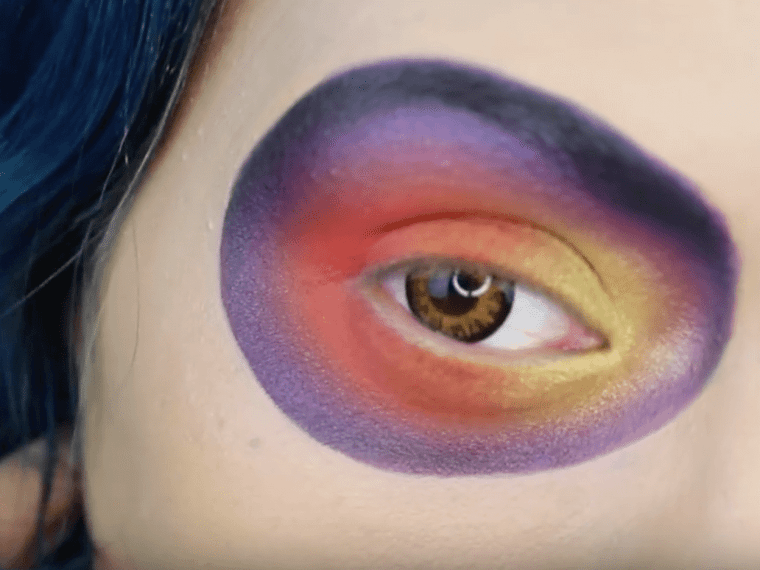
Voila!
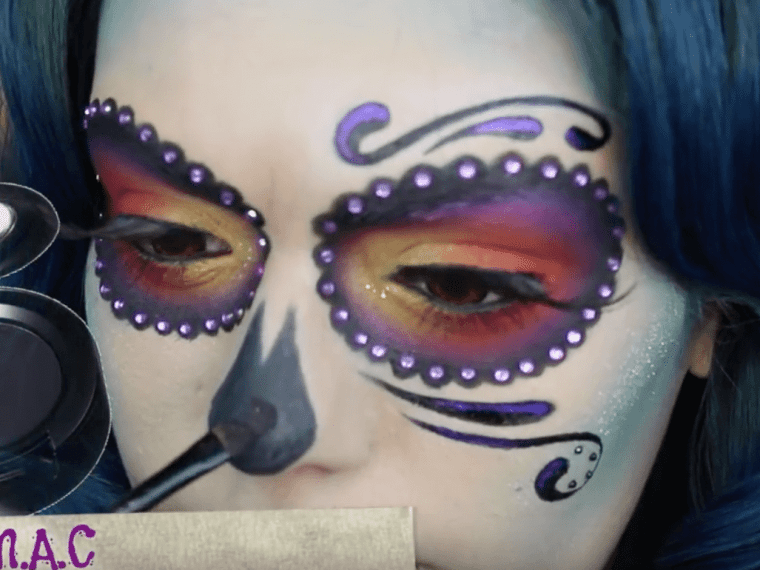
Pace 8: Cheekbones!
Time to accentuate those cheekbones and bring out your inner gothica.
Again, using a contrasting colour such equally green or blue, alloy in your cheekbones. Aim for your ear to the corner of your mouth. For a little extra pizzaz top it off with some glitter. One time that's done, alloy the same colour around all the edges of your face including your neck, jaw, and forehead.
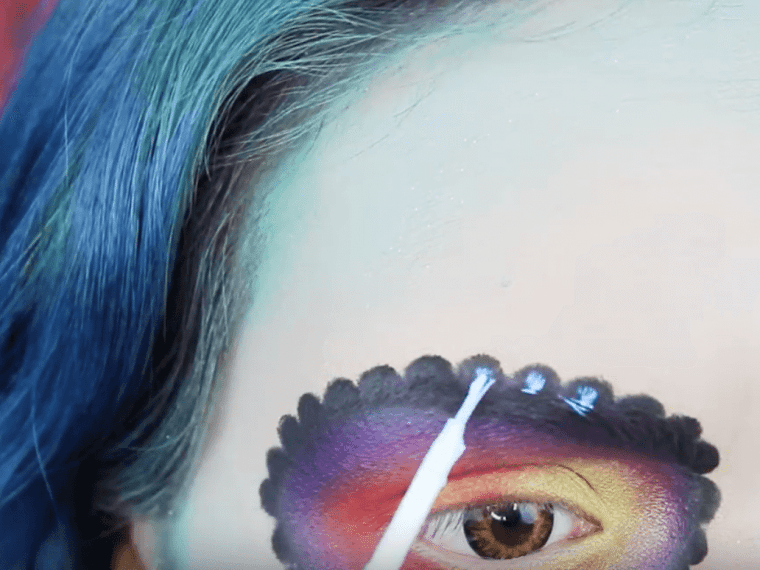
Step 9: Details!
Using a makeup brush like to this, add some night circular dots around the outer circle of the eye socket you just drew.
Take your time to get it only perfect, in that location's no rush.
Step x: Use Eyelash Glue To Add together Some Sparkle
This is my favorite role. Using eyelash glue carefully dot on a small blob into the center of each circumvolve around your middle, like this…
Exist careful not to add too much.
Pace 11: Using Tweezers Apply Some Gemstones
You can find these gemstones at any smash parlor. Normally they are used to add together decoration to a manicure, but today yous can use them to add together some sparkle to your face up.
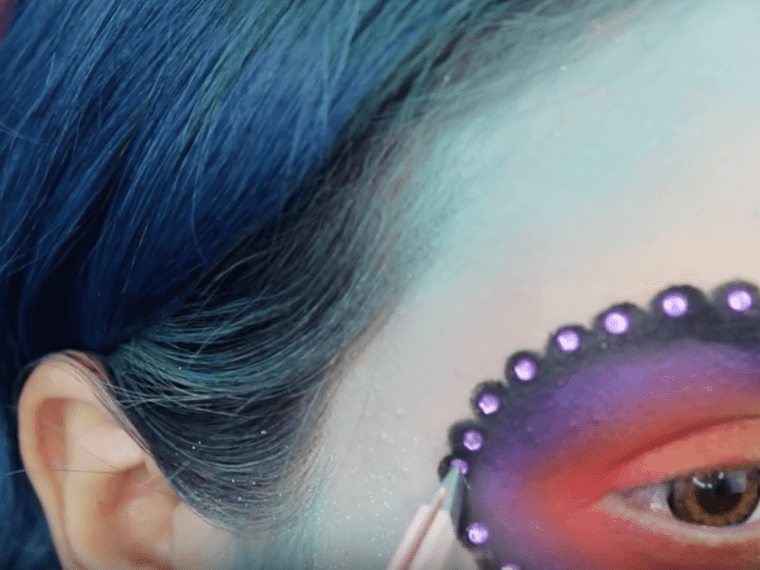
Information technology can be a little fiddly so don't get frustrated, but take your time and use tweezers to position them perfectly.
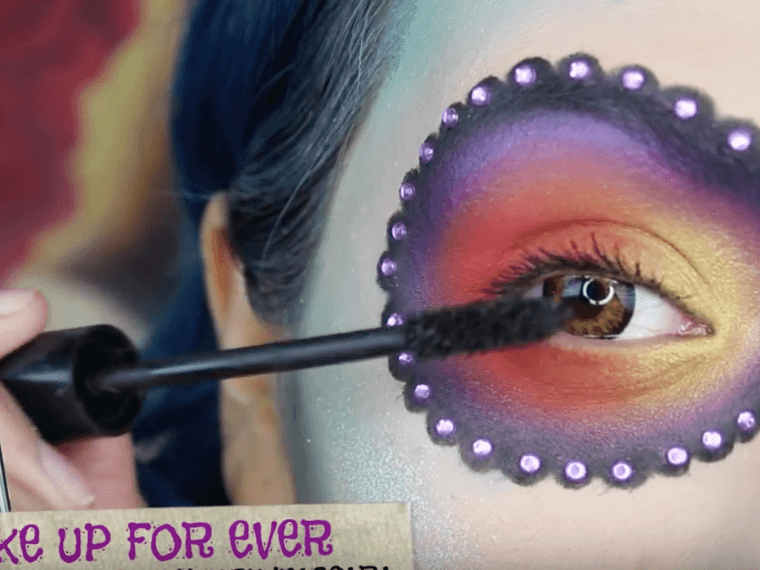
Step 12: Mascara
Lengthen those lashes and add your favorite mascara!
Pace thirteen: Add Lashes
I dear zilch more I skillful prepare of lashes to really brand your optics pop. This step really takes the wait to the next level.
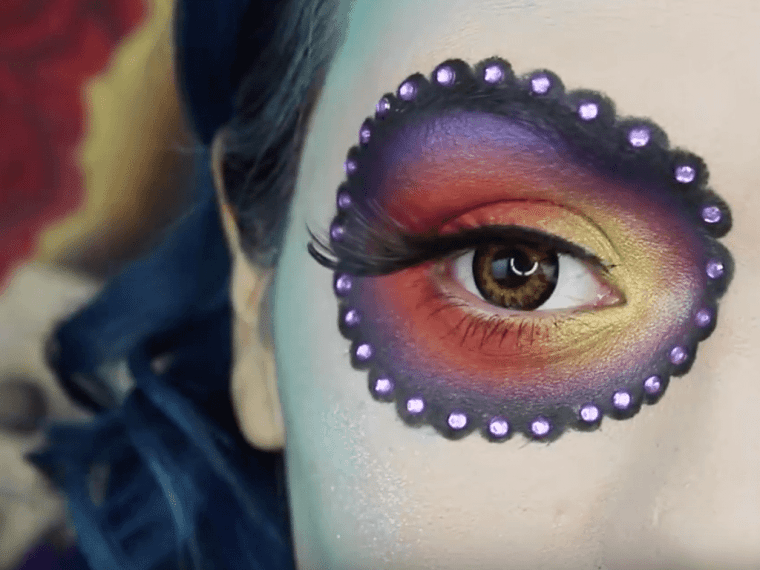
Looking good!
Stride fourteen: Line Your Lower Lash Line
Add even more drama to the eyes and carefully line the lesser lash line with a black liner.
If you clothing contacts you lot tin can leave this step out.
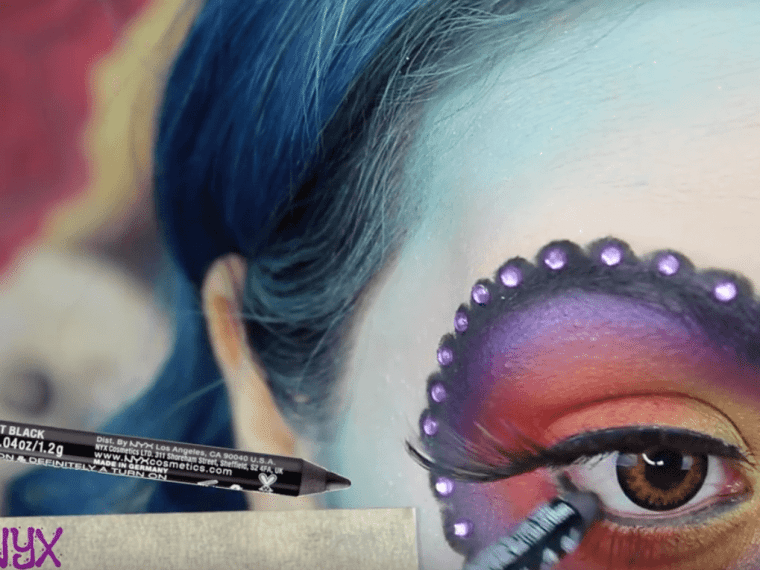
Step 15: Add together Some Swirly Details
Above each of the eye sockets, yous've drawn add some swirly brows to really define your face.
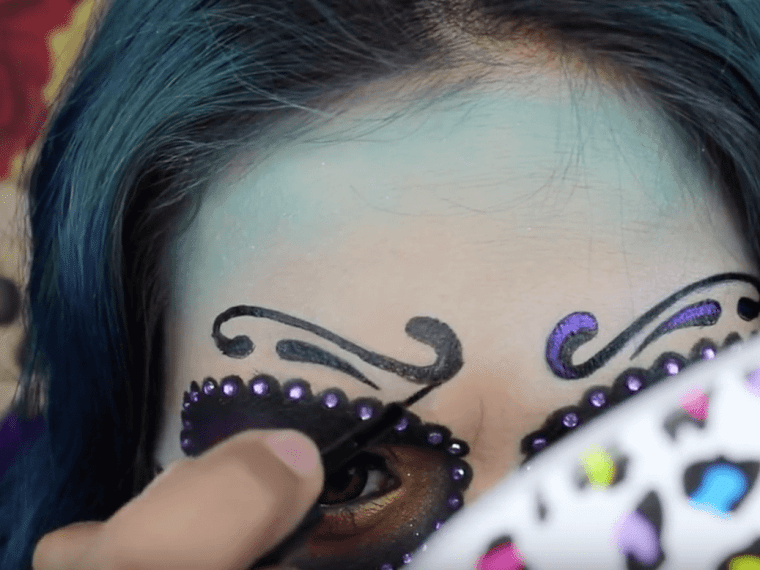
Mix it up a little, add a matte and a shimmery color.
Step 16: Undereye Details
Similarly, add some actress details under the eye. Teardrop shapes and swirls look incredible with this look.
If you lot don't experience comfortable going in with a liquid liner you can always draft them on with a pencil first to avoid any mistakes.
Step 17: The Skeletal Nose
Depict a teardrop shape onto the cease of your nose to create the illusion of a black void.
Almost finished!
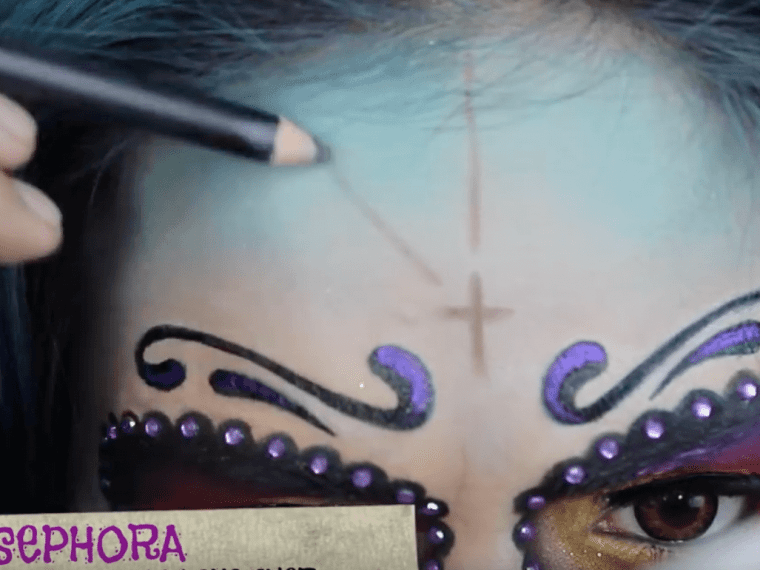
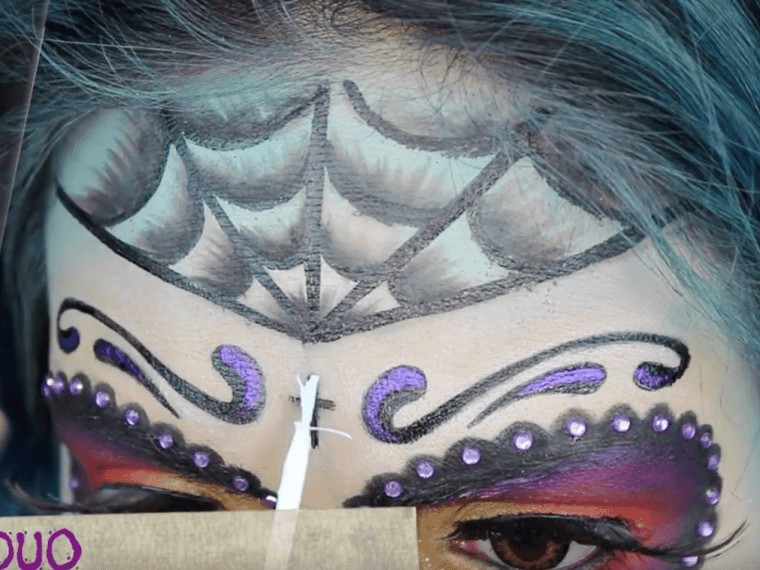
Step 18: Finishing Details
Flesh out your forehead with a fiber shaped design. Retrieve to typhoon it on first with a pencil liner to avoid any major mistakes.
Footstep 19: Blend
Get over your blueprint with a liquid liner and carefully blend with a makeup castor to add some depth to your face.
Add a tiny cantankerous between the center of your brows, and employ some eyelash mucilage to stick some gems on for more than sparkle.
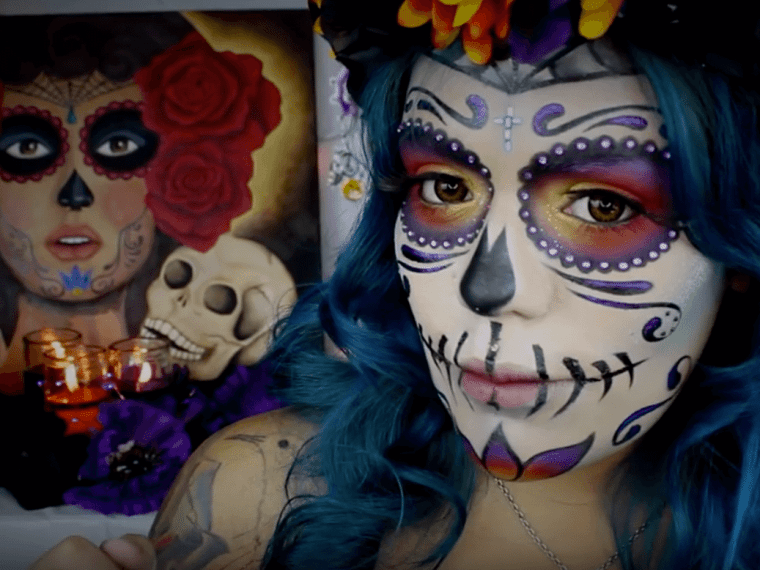
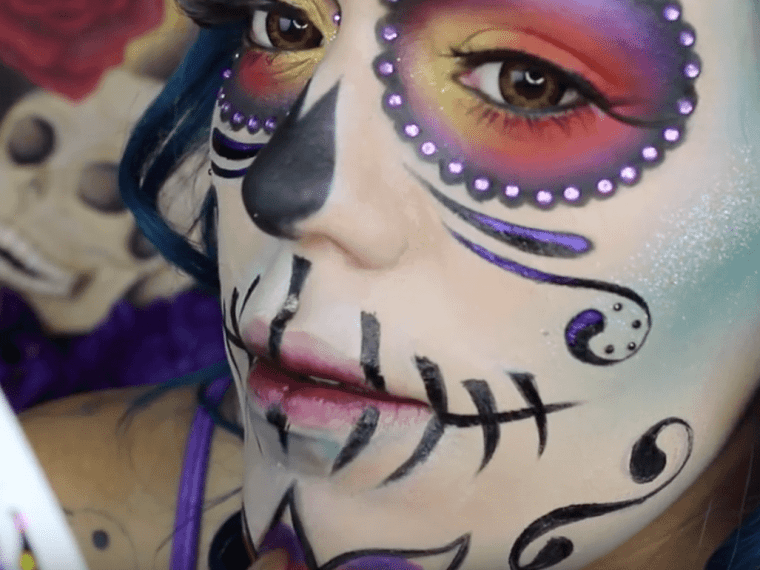
The end result should look something a little like this…
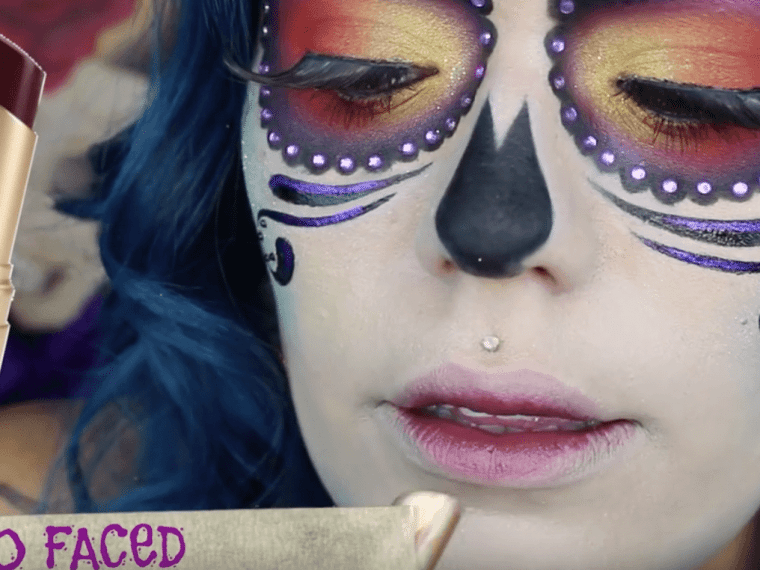
Footstep 20: Time For Lips
Using a dark red/regal color add together some color to the center of your lips. Don't worry most filling it out to the edges, as this will just add together to the expect of beingness 'dead'.
Step 21: Lip Details
Add some stitches for actress drama!
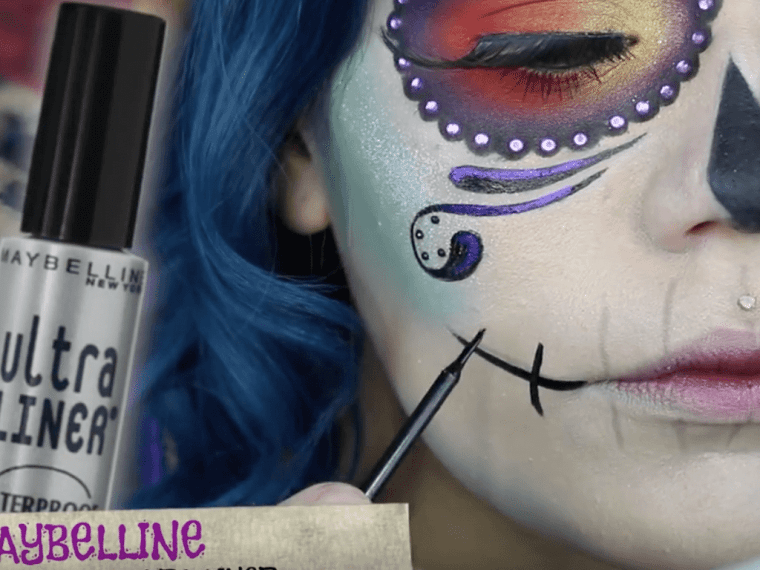
Remember to use your pencil liner first to arts and crafts a pattern you're happy with before going in with the liquid liner.
Step 21: Mentum Details
Finally, complete the wait with a design on your chin.
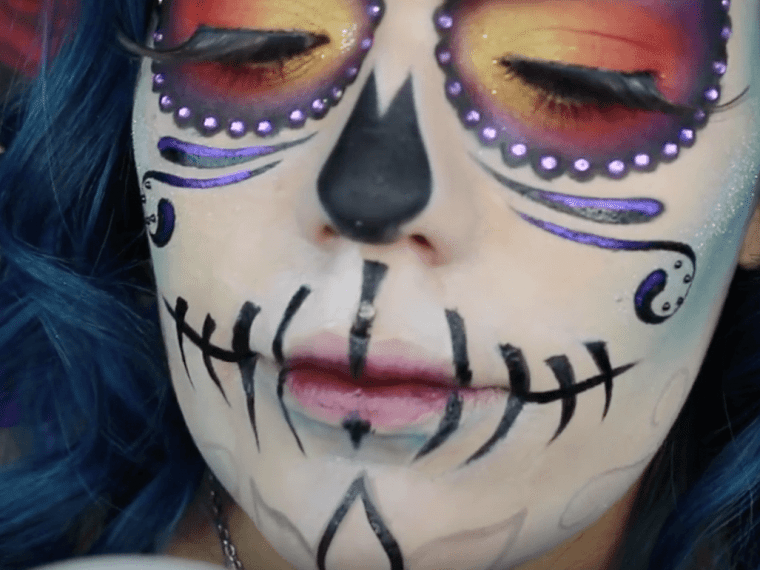
Flesh it out with some color, it looks amazing if you get for the aforementioned colors you used on your eyes.
Actress swirls either side will complete this stunning Day of the Expressionless look.
Ta-dah…
Happy Celebrating!
Simply stunning.
Watch the total tutorial here:
If you lot liked this postal service be sure to SHARE it with friends and family on Facebook.
Feel free to leave your thoughts in the comments section, we would beloved to hear from you.
If you lot have any questions for our team at PlayaDelCarmen.Com and then experience free to give united states of america a call on our toll-free number+1 888-537-9797
Source: https://www.playadelcarmen.com/blog/day-of-the-dead-makeup-tutorial/
Posted by: gordonworear.blogspot.com
0 Response to "How To Apply Makeup For Day Of The Dead"
Post a Comment